In this article, we will talk about the Microsoft Photos app. It’s a built-in app of Windows 10 that lets you view images. It also offers few basic photo editing features. If you have ever used Microsoft’s Photos app, you might know that the app automatically shows the photos and videos stored in the local Pictures folders along with the files stored in OneDrive. If you are amongst those users who store lots of files in the Local Picture folder or OneDrive, you would probably have lots of pictures in the Microsoft Photos. Let’s assume you have lots of images in a selected folder, the photos app will show all-on them. Sometimes, you might need to open few images in short intervals. At that time, you might find the ‘Favorites’ feature useful. Microsoft Photos app allows you to mark your pictures as a favourite to make sure you can quickly access them when you need them. Also Read: How to Hide & Lock Photos in Windows 10
Steps to Add & Remove Favorites in Photos App on Windows 10
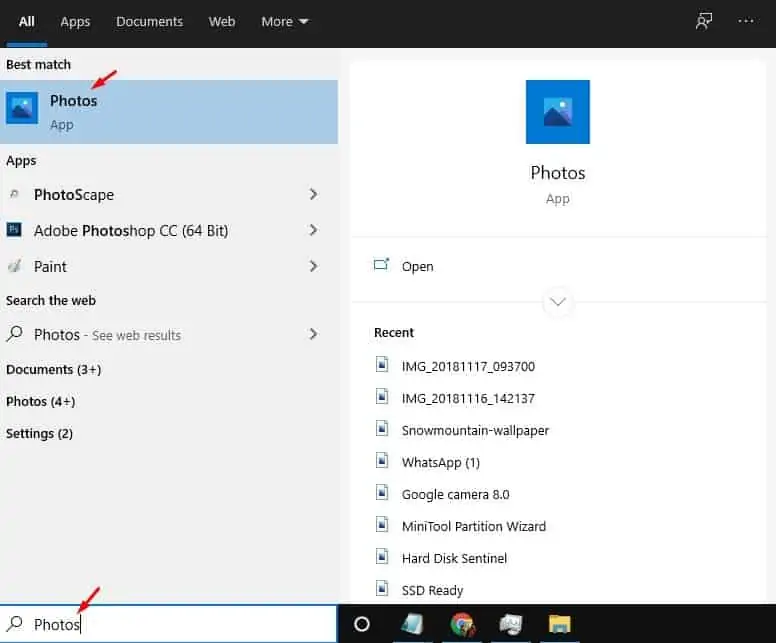
When you mark a picture as a favorite, it automatically gets added to the photo app’s Favorites album. You can open the Favorites album of Microsoft Photos to find your pinned images. In this article, we will share a detailed guide on how to add or remove favorites in the Photos app in Windows 10. Let’s check out. Step 1. First of all, search for Photos in the Windows search. Now open the ‘Photos’ app from the list.
Step 2. Now you will find the images saved to your Picture folder.
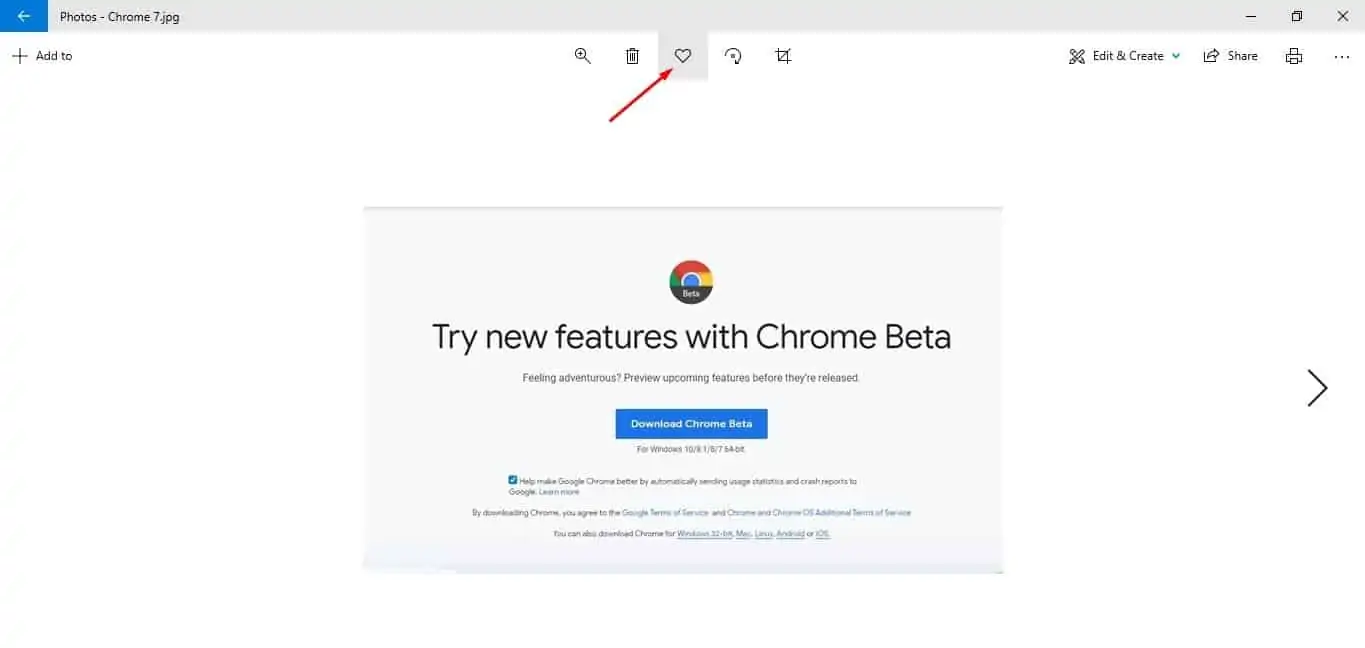
Step 3. Just select the photo which you want to add to the Favorites album. Step 4. Now click on the ‘Add to Favorites’ button (Heart icon).
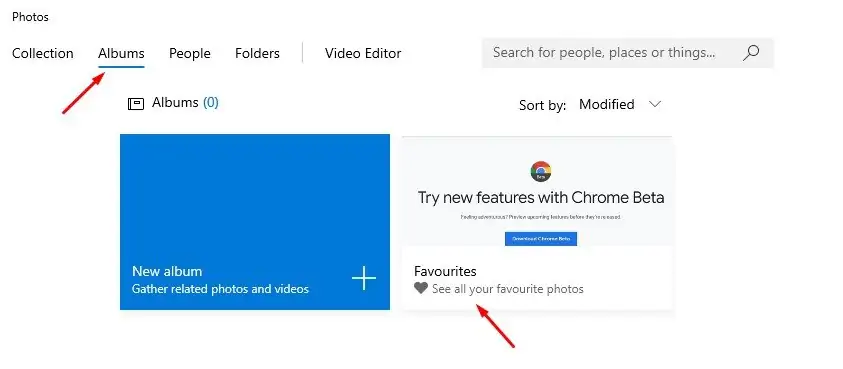
Step 5. This will add the photo to the Favorite album. To access those images, open the Favorites album.
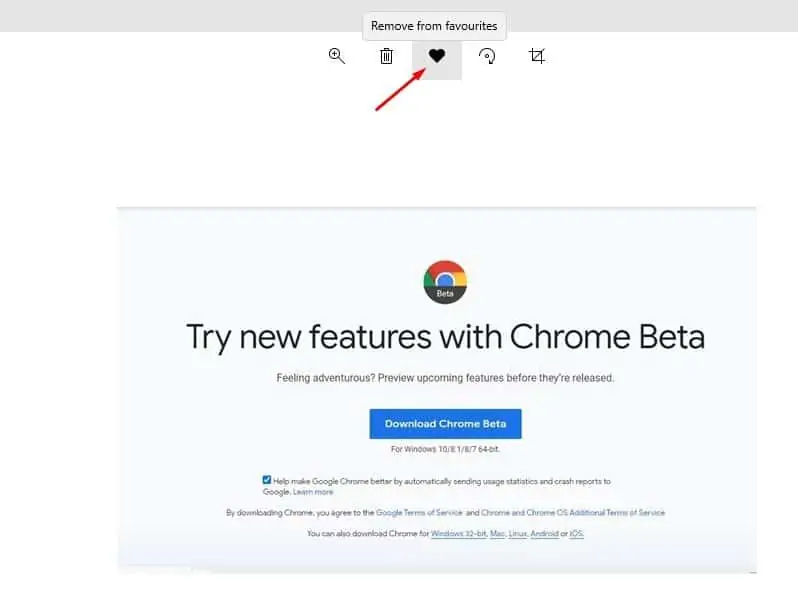
Step 6. If you want to remove an image from the Favorites album, open the image and click on the ‘Remove from favorites’ button.
That’s it! You are done. This is how you can add or remove favorites in the Photos app. So, this article is all about how to add or remove favorites in the Microsoft Photos app. I hope this article helped you! Please share it with your friends also. If you have any doubts related to this, let us know in the comment box below.


